 With bonus Beast of Nurgle!
Step 1: Basecoat
 Same with my Skulltaker, all my daemons are based on cork/lava.
Step 2: Calthan Brown
 As a basecoat for the ground.
Step 3: Bubonic Brown
 Lightly drybrushed over the cork, to bring some texture to it.
Step 4: Iyanden Darksun
 This will serve as a basecoat for the lava.
Step 5: Fiery Orange / Golden Yellow
 This is a wet blend. First, lay down the Fiery Orange. Next, start leaving blobs of Golden Yellow in the still wet Fiery Orange. Next, use your brush to drag the orange around, creating "currents" and bubbles.
Step 6: Dheneb Stone
 Basecoat this on all things fleshy and bone. For the Beast, that's the whole model.
Step 6: Skull White
 I've been having a lot of success with this 3-step flesh effect. The White is lightly drybrushed over the Dheneb Stone. This is the highlight, and will show through under the wash.
Step 7: Ogryn Flesh
 Make it heavy, get it all over the fleshy bits.
Step 8: Thraka Green
 Now we need some green in there. They are Nurgle after all. As far as choosing where to put the green, I went with extremeties (toes, fingers, etc) and along creases/folds in the skin. I wanted this to look gangrenous.
Step 9: Iyanden Darksun
 Epidemius doesn't have this kind of area, but the Beast does. I based in yellow the area where the skin had been pulled back. Yellow, because I wanted it to look like especially diseased subcutaneous fat, which tends to be yellowish. We'll wash it in Red to make it look a bit bloody, but there's another thing that will be washed in red, so let's do that first...
Step 10: Skull White
 This is for all those little bumps along the skin. I want them to look like blisters, zits and boils. Hit them with the white. Also, on Epidemius, the maggots on his stomach and his eye.
Step 11: Baal Red
 Four things are happening here. First, tongues. Second, get this thick in that open skin area on the Beast of Nurgle. Third, around the zits and boils, to make them look aggravated. Lastly, and you see this mostly on Epidemius, on joints. The red will make his knees, knuckles, elbows, etc look puffy and inflamed - a hallmark of chronically sick/diseased peoples.
Step 12: Scorpion Green
 In a lot of those areas you probably hit with Thraka Green, you'll see some details that look like straight-up-slime. I touched up those areas with Scorpion Green to really bring them out. Also, some stipling on Epidemius' chest, as I started to realize he'd apparently vomited on himself (amazing the details you pick up only as you paint). I found a few slime areas that had not been previously picked out with Thraka green on Epidemius (in the throne) and based them in Scorpion Green as well.
Step 13: Thraka Green
 This was for those aformentioned areas on Epidemius' throne.
Step 14: Dheneb Stone
 With all this wash hullaballoo, some got on the areas that are bone, so this is to go back over those areas to start the bone process.
Step 15: Devlan Mud
 On all the bone.
Step 16:Bleached Bone
 This is a drybrush effect. We want to bring some of the color back, but not undo what the Devlan Mud brought out in the cracks/crevices.
Step 17: Skull White
 This is an even lighter drybrush, along edges, points, and skull faces.
Step 18: Gryphonne Sepia
 Mostly along the bases of the bone areas, where there is still some Devlan Mud. Try to stay away from the areas where you applied the Skull White. At this point, the Beast of Nurgle is done. The rest of this tutorial will be focusing just on Epidemius.
Step 19: Graveyard Earth
 Basecoat for the wooden throne and the wooden sword handle.
Step 20: Bleached Bone
 This is a light drybrush over the wooden throne and sword handle, to bring out the grain and the edges.
Step 21: Devlan Mud
 Also for the wooden throne and sword handle.
Step 22: Boltgun metal
 Base all the poles and metal bits along his throne. Don't forget the sword.
Step 23: Shining Gold
 For the bell as well as his arm bracelet and hourglass frame.
Step 24: Mithril Silver
 This is my new favorite way to highlight gold. Lightly drybrushed along anything gold.
Step 25: Devlan Mud
 Heavily coat anything metal.
Step 26: Fortress Grey
 This is for the hourglass itself.
Step 27: Snot Green
 This is for the sand (slime?) in the hourglass.
Step 28: Thraka Green
 This was placed sporadically along the metal bits, to show Nurgle's corrupting power.
Step 29: Scorpion Green
 Again to pick out those slimy areas along the metal. I realize afterwards that a few of these steps could have been consolidated, but I wanted to show you the full thought process. A lot of these details didn't become apparent until after the painting process had already begun.
Step 30: Macharius Solar Orange
 Very, very lightly drybrushed over various (iron) metal bits like the sword. This will look like rust. Try to stay on flat areas, and not on edges. Typically rusty items keep their color along edges where they're likely to strike against something.
Step 31: Charadon Granite
 We're moving along to the only details left: the banners. This is for the left one.
Step 32: Fortress Grey
 Drybrushed along the banner.
Step 33: Chaos Black
 This was used for a chaos star on the grey banner. You don't need to be neat - it's chaos.
Step 34: Devlan Mud
 To finish off that same banner. I am actually going for a faded look in both of these, to make them look very worn and old. If you want something more vibrant and/or high-contrast, you may want to do the design after the wash (and in yellow or green instead of black).
Step 35: Bubonic Brown
 This banner will be Nurgle-specific.
Step 36: Goblin Green
 For the Nurgle-balls.
Step 37: Thraka Green / Baal Red
 I splattered these two colors on the banner to make it look bloody and dirty.
Step 38: Devlan Mud
 I made it heavier along the end/edges to make it look more worn and filthy. The original logo is barely seen, and looks very faded. That's how I like it for Nurgle.
Step 39: 'Ardcoat
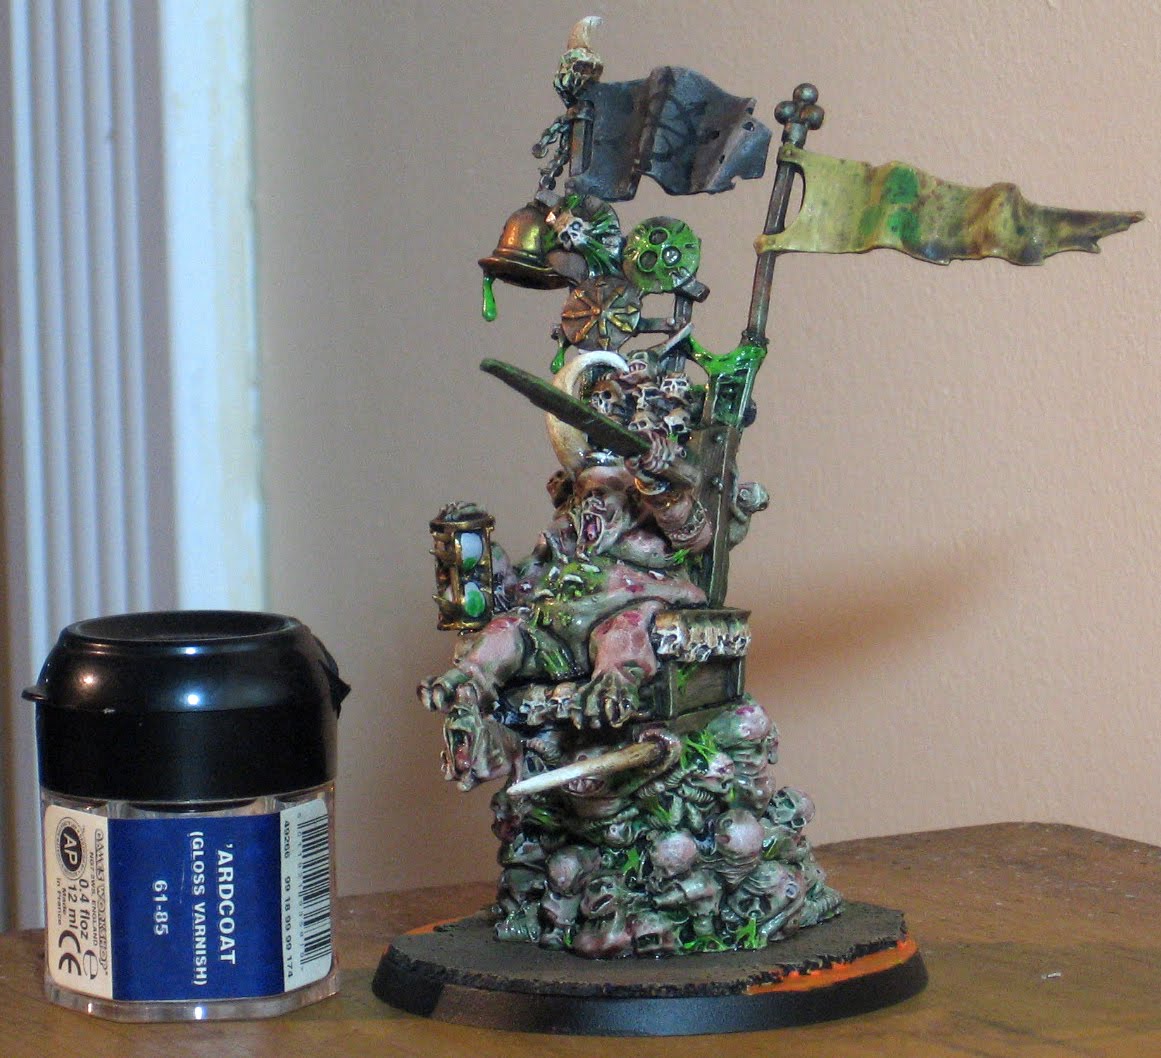 This finishing touch was put only on areas that are wet - vomit, slime, etc. It gives it just one added dimension of gross and ensures that my wife will never play Nurgle.
Well, there we have it. Putrid, filthy and rotten. Awesome.
Let me know what you think about it all.